Monday

Spiced Almond and Apple Granola


Casual breakfasts are the key to a stress free day here in our household. Sunday, Monday, Tuesday...
everyday here is packed with a schedule and places to go!


At least once a week I make a big batch of this granola. This is an adapted recipe that my mom happened to get from one of the cooks at our church's (Calvary Chapel) Retreat Center here in our local San Bernardino Mountains.


What I love about this granola is the ease of changing the flavor with just a different combination of fruits, nuts and spices. My husband and I like ours with plain greek yogurt and fruit, while the kids prefer there's with milk.. and sometimes as a snack in a baggie for their lunches. This shoot was photographed using a wonderful cranberry sauce, "Crushing Cranberry" that my friend Cheryl made. She made around 200 jars for our church's Christmas Boutique. The best Cranberry Sauce with the essence of orange I've ever had!


Here is the simple granola recipe.. I hope you enjoy!

Laurie's Homemade Granola
Adapted from CC Conference Center Twin Peaks Kitchen
1 Cup Almonds
1 Cup Shredded Coconut
1 tsp. Ground Cinnamon
1/2 tsp. Ground Cloves
1/2 tsp. Fresh Grated Nutmeg
6 Gluten Free Oats
**Chopped Apples
1 Cup Honey
3/4 Cups Salad Oil

Preheat oven to 350 degrees

In a large bowl, combine almonds, coconut, cinnamon and oats. Mix well.
In a small saucepan, heat honey and oil to simmer, add to the oats mixture
stirring to mix. Divide between two 9x13 or so, baking dish. Bake for 25 minutes stirring constantly so it doesn't burn. Add chopped apples, stir. Bake an additional 10 minutes. When granola is cool, store in sealed containers.


** For a Holiday Granola; I make it with the slivered almonds, chopped apples, cinnamon, cloves and nutmeg. Perfect for our breakfast celebration! But I often substitute *soaked raisins or dried cranberries with a variety of nuts and spices.

* For soaked raisins; Put your raisins in a small bowl and cover with boiling water. Let them steep for 5-10 minutes or over night, and then drain them thoroughly. 


holiday chocolate almond bark

Who doesn't love chocolate.. and what better, than to make it and give it away as gifts! In 
my home it's a tradition to start our baking when the kids have Thanksgiving break. This week
our youngest was off earlier than usual so here we are, celebrating mom and daughter time and looking forward to the holidays with Peppermint Chocolate Cherry Almond Bark. 


This is the easiest candy to make.. you don't even need a candy thermometer, which I love. Every year when I pull mine out to use, it's either broken or just not calculating the correct temperature. So voila!! No stress about running out to grab a thermometer.. this time! While I have a link to Callebaut chocolates, you can use another good quality chocolate, I think Ghirardelli Chocolates are yummy too. Quite a few years ago I was fortunate enough to find this chocolate in a local candy making store and I fell in love with the taste and texture. Oh my.. it's so buttery and smooth! I hope you enjoy.. Buon Appetito and Happy Holidays!!

Ingredients
1 block good quality dark chocolate (minus a few extra squares)
1 block good quality milk chocolate (minus a few extra squares)
* a few extra squares of chocolate for tempering
1 cup white chocolate nibs or chips
2 tsp. solid coconut oil (you can use vegetable oil also)
1 cup crushed peppermint candies
1 cup chopped almonds
1 cup dried cherries
Offset spatula
Baking sheet covered with parchment paper
Wooden skewer or knife


Directions
1. In a heat proof bowl, add your white chocolate nibs and 1 tsp. of coconut oil. Heat for 1 minute in microwave oven. Stir and heat again for 30 seconds. Stir again and it should be ready.
2. On the stove top in a heavy duty pan, add 1 tsp. of coconut oil and all but a few blocks of the dark and milk chocolate. *The saved chocolate will be used for tempering. Heat on medium low heat so the chocolate melts slowly without it scorching.
3. When chocolate is melted, take it off the heat and add a few of the extra chocolate squares.
Stir till incorporated.
4. On prepared baking sheet, pour your dark/milk chocolate blend onto the paper. With the offset spatula smooth it out across the paper to fill the parchment.
5. With a spoon, drizzle the white chocolate horizontally across the dark chocolate to create lines.
((Pictured below))
6. With your skewer or knife, run up and down through the white and dark chocolates to create the swirl pattern. ((Pictured below))
7. Sprinkle Peppermint candies, dried cherries and chopped almonds on top.
8. Chill in refrigerator till firm. Cut diagonally or in long strips, or for a rough look, break into pieces. Store in an airtight container in refrigerator. 


Quite a few years ago I was fortunate enough to find Callebaut Chocolate in a local candy 
making store, and I fell in love with the taste and texture. 

   Pour the white chocolate horizontally across the dark chocolate to create lines. 
   With your skewer or knife, run up and down through the white and dark chocolates to                  create the swirl pattern.


Broccoli Rapini with a Garlic & Lemon Sauté


Broccoli Rapini, also known as Broccoli Rabe, is a flavorful but bitter vegetable . Rapini is not a mild flavored green at all! Although it is more closely related to it's Chinese brother Brassica, the Italian cultivar is pungent with a nutty flavor but even more bitter than radicchio, another one of my favorite Italian vegetables. Rapini is common and now readily available across the continental borders but it hasn't always been. Common in China and Italy it is thought to have descended from the turnip family. 

Growing up in California we didn't see this vegetable until later in years, but my mothers preparation for broccoli is much like the traditional saute preparation for Rapini. I have seen Rapini prepared in a number of ways, but the most common is sauteed in garlic, red pepper and olive oil. I take it a step up and thinly slice and chop lemon rind and add that to my saute also. 

Ingredients
1 -2 bunches Broccoli Rapini (rabe)
2 small lemons
1/4 cup plus 2 Tbsp. olive oil
1 Large or 2 small cloves garlic
1/2 teaspoon red pepper flakes
juice of 1 lemon
salt


For the lemon preparation I take two small lemons and closely peel them away from the pith. The pith is bitter and adds a most offensive taste when not disposed of. I then finely chop the rind. Finely chop 1 plump clove of garlic.

In a saute pan, add 1/4 cup plus two Tbsp. of extra virgin olive oil and garlic. Slowly brown till garlic just starts to turn color, add 1/2 teaspoon of red pepper flakes and continue to saute for 30 seconds.. then add the chopped lemon rind. Turn heat off but leave pan on the burner. The heat from the oil and garlic will draw the flavors from the lemon rind without burning the peel adding a beautiful bouquet. 

Rapini is sold in a bunch with a tie around it, one bunch usually does it for my family because the kids have not yet acquired a taste for it. Rinse your rapini well. After you rinse it, cut off around two inches from the bottom. 

For preparation have a bowl filled with ice water. In a large skillet or pot, boil enough water to just cover your vegetable. Add salt to the water and wait till it comes to a rapid boil. Add rapini and par boil for three minutes. Take out and put in the cold water. This will stop the cooking process as well as maintain the bright and beautiful color of your greens. Drain well and pat dry with a towel before you saute it in the hot oil. 

When rapini is drained, add it to the pan that you sauteed your garlic, red pepper and lemon rind in. Turn the heat on and saute coating all sides of the rapini. With the lemon that you peeled the rind from, squeeze the juice over the sauteing vegetables. The rapini should be salted enough if you added salt to the water you boiled your vegetables in.  Serve in a flat dish with lemon wedges. 

Collard Greens with Andouille Sausage


This recipe is for my sweet dad..
Last week when I was visiting my parents’, he asked me if I had ever made collard greens. I love greens.. but collards weren’t one of the vegetables we grew up with in our Italian home. My research and investigation began at the grocery store with my first purchase of this Southern favorite. 

The texture is hearty and firm with a mild taste. This vegetable could hold up to a protein and spice! I have always wanted to make Andouille sausage, and I totally envisioned the spiciness with the mild flavor of the collards. So my mixing and matching began. Really simple ingredients, but such a beautiful melding of flavors and texture. You can almost do without the extra heat of the red pepper flakes because the sausage is so spicy, but the greens really need the seasoning. Be sure to cook your sausage separately to let them keep their own unique flavor. It was really the collards that I intended to enhance. This dish was a success, and my introduction to Cajun style cooking! Can’t wait to make blackened fish!! :)


Collard Greens with Andouille Sausage

Ingredients
1 Large Bunch Collard Greens
1 Pkg. Spicy Andouille Sausage (4 links)
1 Whole Shallot thinly sliced
2 Cloves Garlic finely minced
½ Teaspoon Red Pepper Flakes
2 Teaspoons Lemon zest
¼ of a lemon
Olive Oil


Directions
Clean Collard greens, drain and slice. Set a side.
Slice sausage on the diagonal. Set a side.
In a large cooking pan, brown sausage in a few tablespoons of olive oil. 
Remove sausage and set a side. In same pan, add a few more teaspoons of olive oil, sauté shallots and garlic till translucent and golden. Add red pepper flakes. Add sliced collards and stir till cooked. I like my stems to be aldente, but the leaves to be semi-soft. 
You can cook them to your desired tenderness. Add lemon zest and toss to incorporate. Squeeze around a ¼ of the lemon over the greens. Add the Andouille Sausage back to the collard greens and stir to warm them through. 

Serve on a pretty platter and enjoy!

The Inspired Plate | Fresh From the Market | August 2013


Welcome to August's issue of The Inspired Plate's food photography challenge. This month in the heat of the Summer we're tackling "Fresh from the Market". I chose one of the hottest days to drag my poor husband and daughter to Old Town Temecula. As fun as it was browsing the vendor stalls.. we were literally there to pick up our herbs and produce and get back to the cool of the truck.

This time around I had a recipe in mind.. an Argentinian Pesto called "Chimichurri" to go on our grilled salmon. The sauce is a tangy blend of parsley, oregano and basil blended with garlic, red wine vinegar, red peppers, shallots, olive oil and lemon.


We made a wonderful salad from a beautiful bunch of red leaf lettuce and baby spinach that I also picked up from the Temecula Farmers Market. Added grilled corn, avocados and a balsamic vinaigrette.. and topped it with the Chimichurri topped salmon. So Good!


Argentinian Chimichurri Sauce
(adapted) Recipe courtesy Bob Blumer Food Network.com

1 cup lightly packed chopped "Italian" parsley
3 to 5 cloves garlic, minced
1 teaspoon salt

1/2 teaspoon freshly ground pepper

1/2 teaspoon chili pepper flakes

1/4 cup fresh oregano leaves
1/8 cup fresh chopped basil leaves

2 tablespoons shallot or onion, minced

3/4 cup olive oil

3 tablespoons red wine vinegar
3 tablespoons lemon juice


Place all chimichurri sauce ingredients in a blender or food processor and pulse until well chopped, but not pureed. Refrigerate till your ready to use.


Make sure to visit my dear friend Sabrina Wong, Perth Food Photographer. I know she'll have some wonderful photos to share! Also make your way around The Inspired Plate's circle. I love our gals!! Ciao!!
Laurie

Tuesday

Seasonal | The Inspired Plate | Strawberries and Cream


Seasonal was this months challenge for The Inspired Plate team, I wasn't going to participate this month, and actually am a day late, but my sweet girlfriends from TIP linked me in anyway! LOVE them!!! We had a seasonal lunch treat yesterday for my kids.. Strawberries fresh from the garden!

The TIP gals cooked and baked up some delicious treats for your eye pleasure.. please make your way over to check out their gorgeous photos! My friend Kat Clark ALWAYS has something delicious cooking up.. her family is totally blessed!! :)


Strawberries and Cream

Fresh Strawberries
Whole Cream
1/2 tsp. Sugar (as needed) I use NuStevia 

Clean and slice strawberries.
Add cream.. start with a 1/4 cup. Add more if you like it saucy! :)
Add sugar if needed. The cream has a naturally sweet taste so you don't need much at all. 

Enjoy!
Laurie xo


Wednesday

Gluten Free Almond Oatmeal Chocolate Chip Bar


These almond oatmeal bars are amazing and a must try! :)  Hope you all have a Happy 4th of July!!


Gluten Free Almond Oatmeal Chocolate Chip Bars

3/4 cup oil
1 cup brown sugar
1/2 cup white sugar
1 egg
1/4 cup milk
2 teaspoons vanilla
1 teaspoon baking soda
3/4 teaspoon salt
1/2 teaspoon cinnamon
1/2 teaspoon xanthan gum 
2 cups Almond Flour or Meal
1 cup Quick Oats (GF)
1 cup Gluten Free Baking Mix (Arrowhead Mills)
2 cups chocolate chips (semi-sweet or milk)


Preheat oven to 350 degrees Fahrenheit and spray a 9X13 cake pan with cooking spray.  Combine oil, sugars, egg, milk and vanilla in a mixing bowl and mix on medium for 1 minute.  Add the dry ingredients except for the chocolate chips and mix until just combined.  Stir in the chocolate chips and spoon dough into the prepared pan spreading to the edges.  Bake at 350 degrees for 20-25 minutes.  Cool slightly before cutting into bars.

Monday

The Inspired Plate | Frozen Dessert | June 2013


Welcome to The Inspired Plate's, June edition of our food photography challenge!  This month.. and just in time for the heat of summer, we celebrate with Frozen DessertsI think I can safely say this was a favorite! Everything came together without stress and time constraints, and, I even had my mom's drawer of beautiful serviettes to chose the perfect color napkin to go with the berry colored palette. Thanks Mom!! :)


This is the most simple of desserts! A gluten free tart, strawberry ice cream and fresh berries with a frosty dash of powdered sugar. Pretty and tasty! The gluten free crust is an almond shortbread crust recipe that I have used many times and absolutely LOVE! It makes for a great afternoon tea cookie too. :)


Gluten Free Tart with Strawberry Ice Cream and Fresh Berries

Ingredients
Gluten Free Almond Shortbread Crust
1.5 Quarts Strawberry Ice Cream
2 Pints 2 varieties of Fresh Berries (cleaned and dried)
Powdered Sugar for dusting top
Tart Pan

Gluten Free Almond Shortbread Crust
1/2 cup unsalted butter, room temperature
1/4 cup granulated white sugar
1/2 tsp. pure vanilla extract
2/3 cup fine almond flour (meal)
1/3 cup “gluten free” *all purpose flour
2 tablespoons cornstarch
1/8 teaspoon salt


For Shortbread Crust

Pre-Heat the oven to 300 degrees. Pulse almond flour with sugar in a food processor, add cornstarch, gluten free flour and salt. Pulse till well combined. Add butter and vanilla, mix just enough for the dough to start gathering together. Lightly butter the bottom of a tart pan or a cheesecake pan and up the sides a quarter of an inch. Press the shortbread mixture on the bottom. Pierce with a fork. Bake the crust in the pre-heated oven for 25 to 30 minutes. (till golden)

Directions
Have ice cream ready at a soft stage but not melted. When tart shell is cool, fill with ice cream, blending with swirls. Put back in freezer for 20 minutes. When ice cream is firm, take out of freezer and top with fresh fruit and dust with powdered sugar. It's ready and yummy to enjoy at this point! 


I've missed my TIP girls these past few months! I had been so busy that I really haven't been able to participate in the challenges. I'm so glad to be sharing this month and I can't wait to see all the frozen dessert photos! With fourth of July coming up.. I'm sure I'll have plenty ideas for an extravaganza sweet!

Please now visit my friend 
Sabrina Wong, Perth Food Photography! This girl is my favorite gal down under and talented!!!!! Oh my! She is also a med student and still finds time to travel the world and shoot beautiful photography! After visiting her.. make your way through the circle to see the rest of The Inspired Plate!

Friday

Carnations


As a child I remember spending countless hours in my grandfathers garden. 
His thumb.. the most glorious color green you could imagine! :) He had fruit trees, vegetable plants, flowers.. and carnations! The carnations grew in rows, all lined up and held by strings running length wise. I never thought to ask my grandfather about his passion for carnations.. but it was SO evident by the care he took and how plentiful the crop, that they were pretty special to him. I share in many of the passions my grandfather had. It was only time that carnations would make there way into my garden. I have had dianthus, a smaller anual version in my garden, but never did I have the results my grandfather had. Last year I purchased a few plants of "carnations". I planted them and didn't get the results I was hoping for.. last year. But this year, I was so delighted when Spring proved to be a blossoming time for my plants, which  seemed to spread wider and amass in size compared to the previous year. Last week I couldn't believe my eyes when I looked at all the buds.. and today I must have cut at least 20 tall stalks of carnations with plenty of buds still in tact for the remainder of the season. I am a happy girl.. blessing and thanking my God for the beauty in my garden. "The time of singing has come".. I hope one day in heaven I can tell my grandfather how much I appreciated and learned from his passion"! 


"Rise up, my love, my fair one, and come away. For lo, the winter is past, The rain is over and gone. The flowers appear on the earth; the time of singing has come..."


Song of Solomon 2:10-12a


Have a Favored Day!
Laurie

An Open Face Sandwich DMC Style


My favorite way to eat a snack.. :)

French bread drizzled with Extra Virgin Olive Oil
Freshly Grated Parmesan Cheese
Sliced Roma Tomatoes
Buffalo Mozzarella
Dried Oregano
Fresh Cracked Pepper
Sea Salt (to taste)
Fresh Basil chiffonaud
Extra basil to top after broiled

I first toast the bread on one side in the broiler at 500 degrees.. for just around 30 seconds to get crisp and golden. ** Watch CAREFULLY!!

Top the un-toasted side with the above ingredients in the order listed. Place back in broiler keeping a CLOSE watch on it. (I keep the oven door ajar) Broil just for around 1-2 minutes or till the cheese is melted and golden. Buffalo Mozzarella is so soft it melts quickly.

Enjoy from my kitchen to yours!

Monday

The Inspired Plate | February | Eggs


Welcome to The Inspired Plate’s February edition of our monthly food photography challenge. Today we are celebrating the “Egg”.  This was a last minute photo shoot for me and I needed to make something quick! With the cold weather we have been experiencing ‘Egg Flower Soup’ sounded like the perfect choice! Although.. I really wasn’t pleased with the lack of “egg lustre”. Eggs really are the prettiest subject matter and I had to at least offer a photo in it’s traditional form. So, a Sunday afternoon brunch dish of ‘Eggs with Andouille Sausage and Fried Potatoes’ made a quick appearance on my photo table too. 


The recipe for the Egg Flower Soup is as simple as a few cups of chicken broth and stirred up eggs. It goes as follows;

EGG FLOWER SOUP (Egg Drop Soup)

Ingredients
4 Cups Chicken Broth
1 Tsp. White peppercorns finely milled
1 Tsp. Freshly grated ginger, or ground dried ginger
2 Tbs. Corn starch plus water to make a thin slurry
2 eggs well beaten with 2 teaspoons of water
2-3 green onions sliced
(Sea Salt if needed)
Chow-Mein Noodles

Directions
Heat 4 cups of chicken broth. Meanwhile, clean and slice green onions and set aside.
Make the cornstarch slurry by adding a few teaspoons of water the cornstarch. Set aside. Add pepper and ginger. Stir till simmering. Add the cornstarch slurry and stir till it thickens a bit. Let come to a gentle simmer and then turn the heat off.
Give the eggs and water another quick whip.. Take soup pot off of the heat. While stirring the soup around, slowly add the egg mixture in a thin stream. The egg will cook in thin shreds. Mix in your green onions and top with chow-mien noodles. Enjoy!! :)


I hope you enjoy our challenge round this month. I am so excited to see what the rest of the gals are sharing today. I'm also excited to share with you, my friend Jayme Franklin | Family Portrait and Film Photographer, has come to join our team. I first met Jayme a few years ago when we shared in a few other personal photo projects. I am SO glad that she has finally taken the foodie plunge!!! Welcome Jayme! xoxo

Now make sure you head on over to my Southern California comadre (girl-friend), Kim Kelly | San Diego Photographer and Writer!! If I haven't told you before, I LOVE this gal and she is an amazing cook, travel and food writer as well as photographer! Please leave her a sweet note, and then make your way through the Inspired Plate Circle!

And here is our Cajun style Sunday Brunch with spicy Andouille Sausage, Fried White Rose Potatoes and Eggs Sunny Side Up! 

Ciao,
Laurie V.


The Inspired Plate Monthly Challenge | January | Healthy


Welcome to The Inspired Plate January challenge. This month our theme is "Healthy". Whew!! I have total baking and heavy food fare burnout. It has been so refreshing cooking on the lighter side with a New Years resolution I am trying to commit to.


With our cool weather I have still been craving dishes on the warmer side, so using Pinterest as a design tool, I pinned salad ideas, fruits and hearty vegetables that looked pretty and would handle my grill pan. (
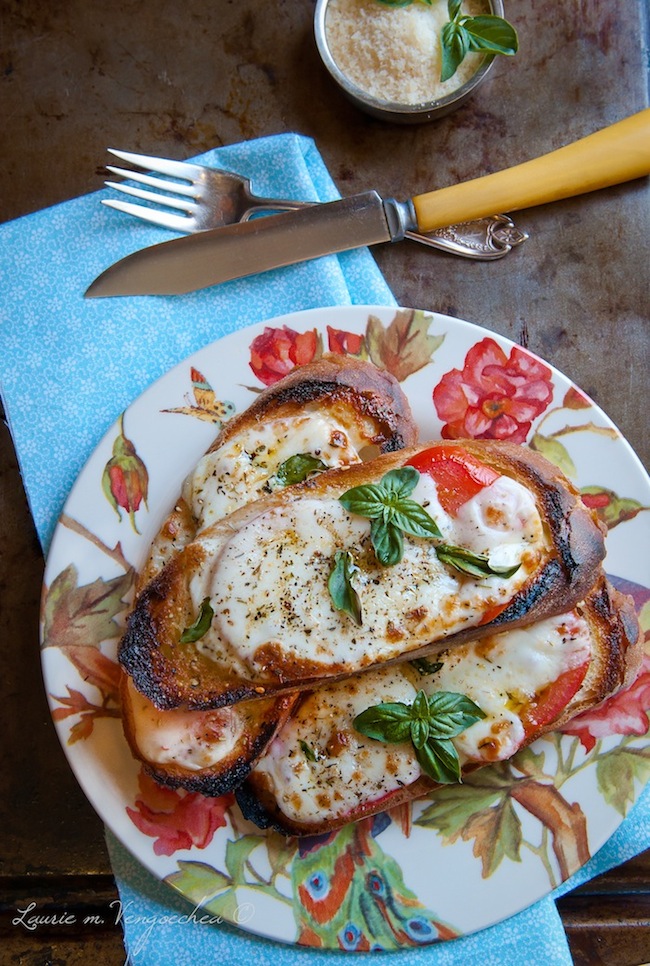
one of my favorite cast iron beauties) And this is what we created! One of my favorite DMC recipes is the toast and crouton embellishments. It is a fantastical way to add "bling" to a simple salad. Your guests won't be able to figure out why your simple looking salad tastes like a gourmet epicurean delight! Check out my "Olive and Anchovy" Crouton on this salad here!


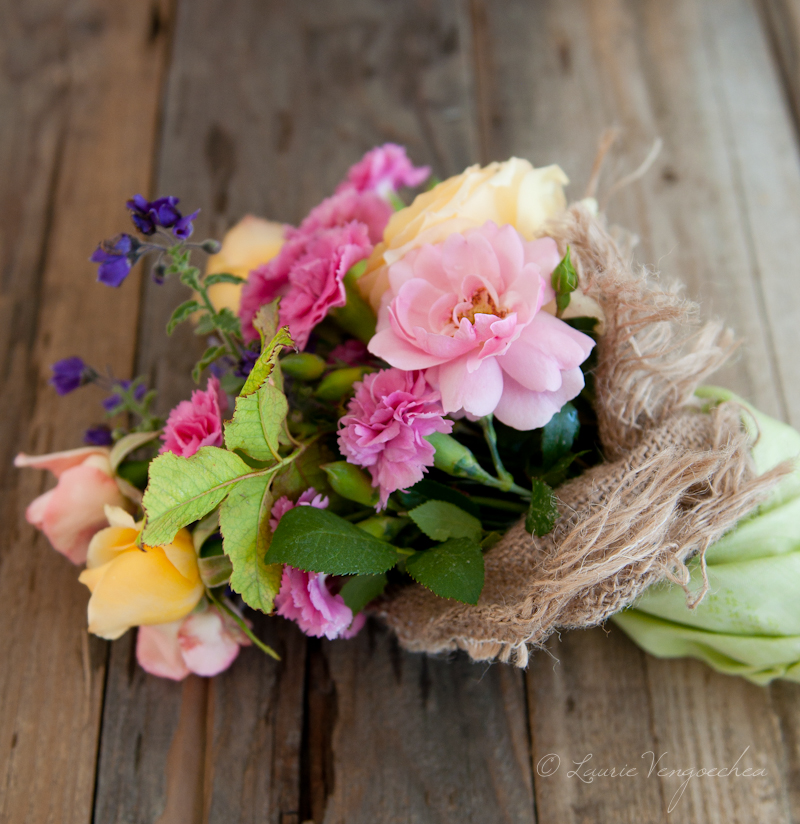
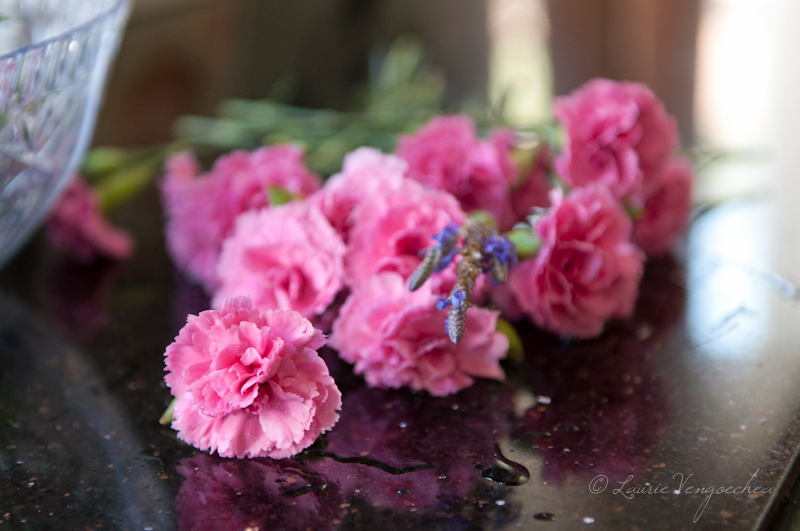
I'm going to tell you a secret that I follow for these TIP challenges. I first choose my props and colors. I set the stage a few times before I actually cook any of the food, and then I photograph my prop table with empty dishes and plates using all sorts of different angles. For this shoot I changed dishes, bowls and napkins.. even my prop boards three times before I was happy with my decision. Then I decide on my recipe. I create my recipe around my shoot for these challenges. That won't be the case if you are shooting commercially or an editorial piece. Usually the food and recipe articles are pre-planned a year in advance by the publication or the vendor who hired you. Stay tuned throughout the year, one of our challenges will be a food vendor shoot. :)


My DMC recipe.. I couldn't have enjoyed a salad better than this one! It was so delicious and healthy! Hope you try it.. you'll LOVE it! And make sure you top some of the toast with the pear, chevre cheese and walnuts. It is SOOO good!

The DMC "Grilled Sweet & Savory Salad"

Ingredients
Small head of Green Leaf lettuce cleaned and dried
Small head of Radicchio cleaned and dried
2 medium firm Bosc Pears cut into quarters brushed lightly with olive oil
1 Baguette sliced
4 Tbs. Red Current Port Jam
Olive Oil
2 cups Baby Brussel Sprouts cleaned and outer leaves removed and cut in 1/2
1/2 cup Walnuts
Chevre Goat Cheese; log or crumbles
Italian Parsley cleaned and dried
Balsamic Glaze

Preparation
Preheat oven to 450˚.
Mix 4 Tbs. of Red Current Port Jam with 5 Tbs. of olive oil together in a bowl. Brush baguette slices with oil and jam dressing on both sides. *Reserve remainder of dressing. Place bread slices on baking sheet lined with parchment paper. Bake for 10 - 15 minutes, till golden. Oven temperatures vary. Keep an eye on them so they don't over bake.

In a cast iron pan heat up 2 tsp. olive oil. Add the brussel sprout halves and a few dashes of salt. Add 1 tsp. of butter and saute turning often till sprouts are browned and begin to get tender. Add walnuts and continue tossing so the walnuts don't burn. After a minute or two, take the brussel sprouts and walnuts off the heat and set a side.

On a preheated grill pan.. or any skillet if you don't have a grill, place pears cut side down pressing firmly for a few seconds to get grill lines. Let cook for two minutes and turn to the other sliced side of pear. Repeat until pear is tender but still has a nice bite. (not too soft) Set a side.

Time to arrange your salad!

With the remainder Red Current Port Jam and Olive oil, add a few tsp. of Balsamic glaze and stir to mix.

In any fashion, tear apart your lettuce and radicchio in a salad bowl. Arrange the toasts, pears, brussel sprouts, walnuts, parsley and chevre cheese. Drizzle a small amount of the dressing over the salad. Enjoy!


I served my healthy salad with a healthy glass of apple juice. Healthy you ask, isn't all apple juice healthy?? :)  Simple 1/2 water and 1/2 apple juice makes for a much less sugary drink. We have been serving apple juice to our 4 kids like this FOREVER!

Apple Juice and Water.. 1/2 and 1/2


I am so glad you visit us here at The Inspired Plate month to month.
We have a great line up of gals and I can't wait to see what "Healthy" delicacies they have in store for us! Next up is my sweet and amazing friend Kim Kelly | Food Photographer and Writer. I'll tell you what.. Kim is the health guru.. umm, except for those killer brownies, :) and I am sure you won't be disappointed with her amazing recipes! After you visit her blog make sure you check out her Pinterest page too!

Please stop by The Inspired Plate's Facebook page, we look forward to being friends!

Ciao,
Laurie